

Embed & Distribution
Set up email for scheduled reports
Connect your own SMTP server so Databrain can send scheduled dashboard reports.
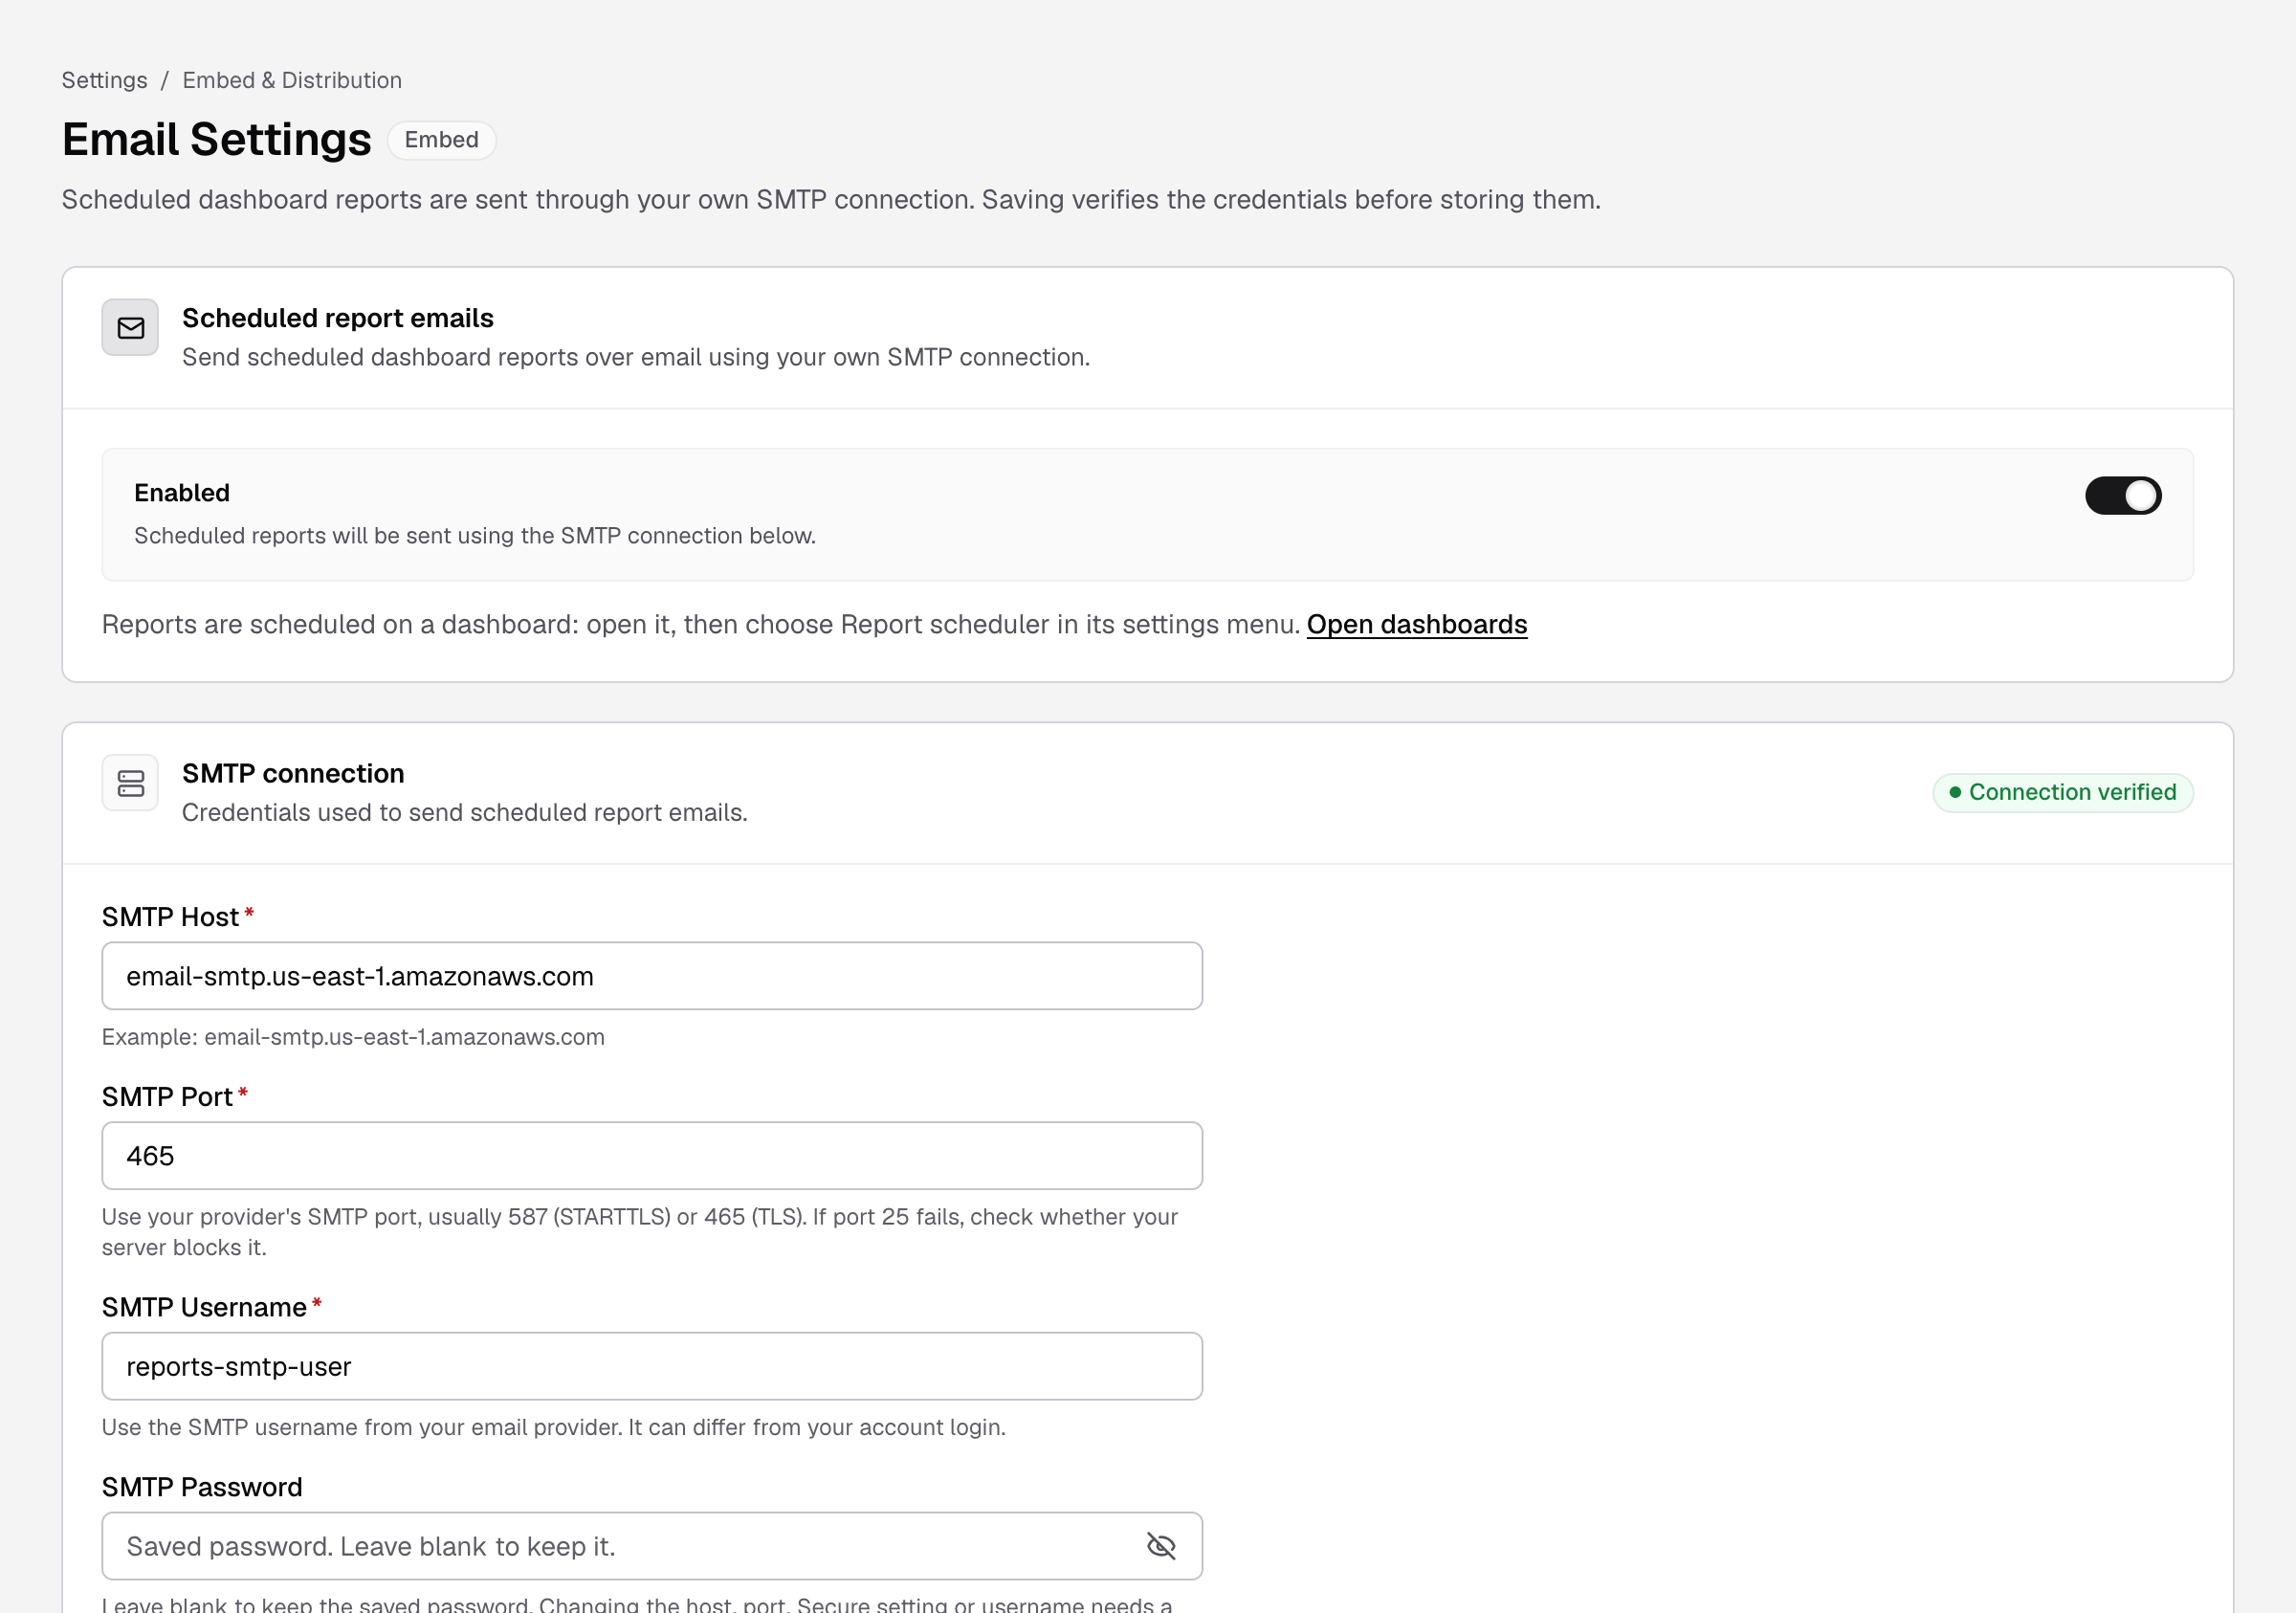
Scheduled reports go out through your own SMTP connection. Set it up once, then anyone with permission can schedule reports on a dashboard.
Before you start
- You are an Admin, or your role has the Scheduled Settings Edit permission.
- Email customization is on the Enterprise plan.
- You have SMTP details from your email provider, for example Amazon SES, SendGrid or Google Workspace.
Steps
- Go to Settings > Email Settings.
- Turn on Scheduled report emails.
- Under SMTP connection, enter:
- SMTP Host, for example
email-smtp.us-east-1.amazonaws.com. - SMTP Port, usually
587(STARTTLS) or465(TLS). - SMTP Username and SMTP Password. Use your provider’s SMTP password or API key, not your Databrain password.
- From address, for example
reports@yourcompany.com. - Reply-to Address: leave it empty to use the From address.
- SMTP Host, for example
- Turn on Secure for port 465. Leave it off for port 587.
- Select Save and verify.
Databrain tests the connection before it saves. You see Connection verified. Next, schedule a report. The dashboard’s Report scheduler stays greyed out until a saved SMTP connection exists.
To change the host, port, Secure or username later, enter the password again. The password is never shown.
Turn it off
Turn off Scheduled report emails and select Turn off and delete. The SMTP connection is deleted and scheduled reports stop sending until you set it up again.
If something goes wrong
- The SMTP server refused the username or password. Many providers need an app password or API key.
- Port 465 expects TLS from the start. Turn Secure on. Turn on Secure, or use port 587.
- Port 587 does not accept a TLS connection from the start. Turn off Secure.
- The SMTP host name could not be found. Check the host.
- The host must not be a loopback, link-local, metadata or private network address. Use the public host name of your SMTP server.