

Workspaces
Create a workspace
Make a home for a team's or a product's dashboards and metrics, and choose the data it reads.
Before you start
- You are an Admin, or your role has the Workspace Create permission. The default Editor, Developer and Viewer roles cannot create workspaces.
- You have a datasource or a semantic model.
Steps
- Go to Home and select Create workspace at the top of the sidebar.
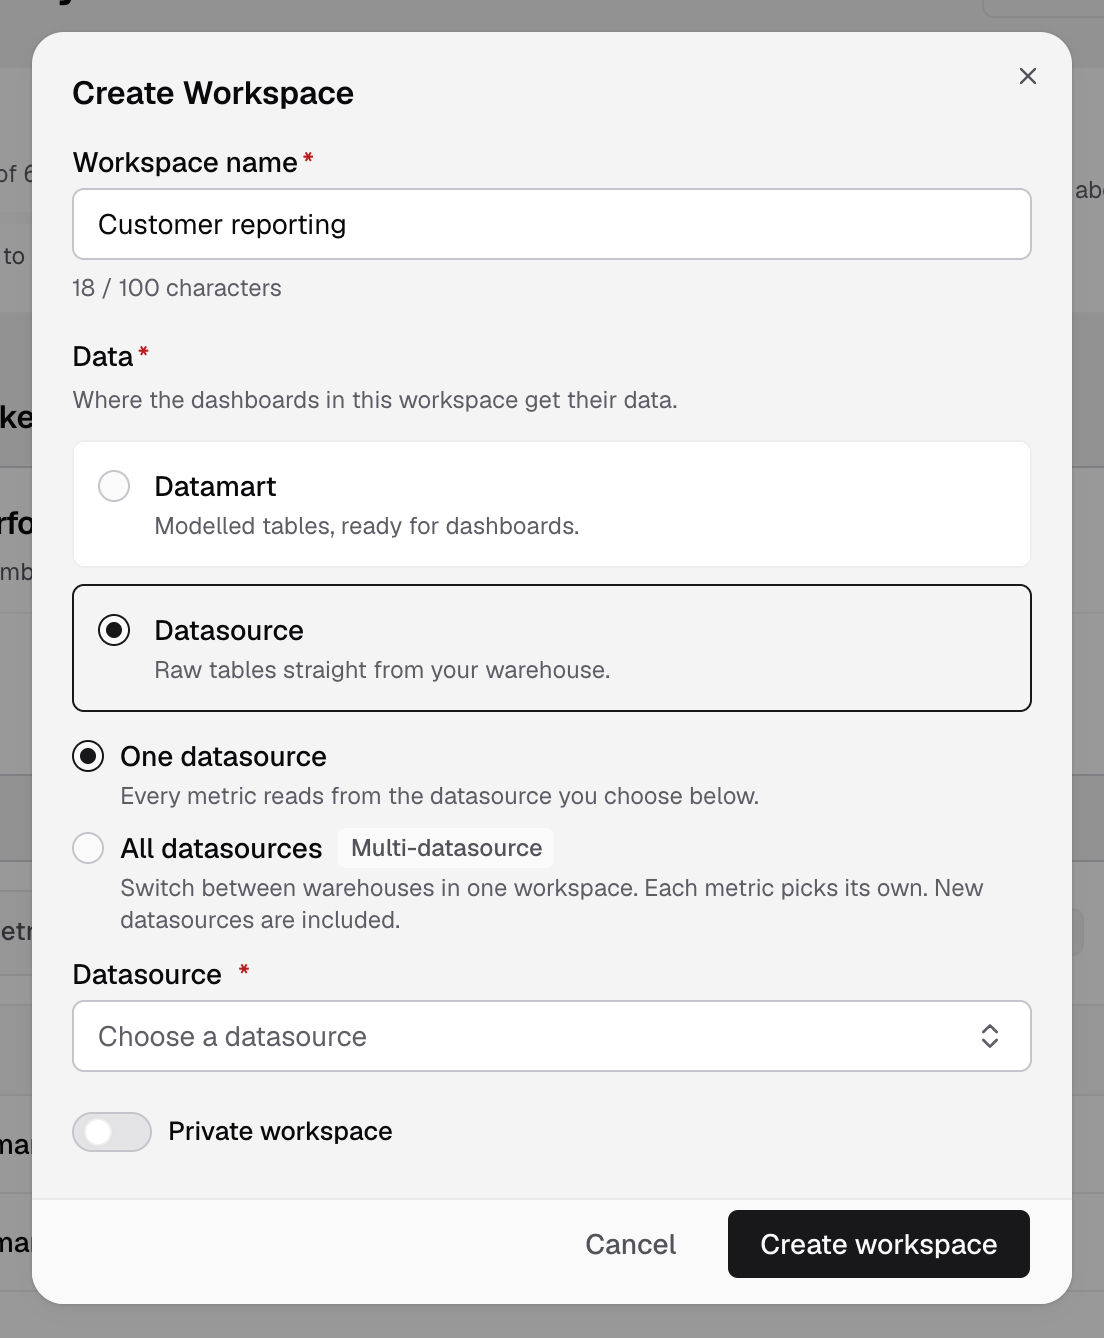
- Enter a Workspace name, for example
Customer reporting. Use 100 characters or fewer. - Under Data, choose what the workspace reads:
- Semantic model or Datamart: modelled tables with business meaning.
- Datasource: raw tables straight from your warehouse.
- Choose how many:
- One datasource or One datamart: pick it in the list below. Every metric reads from it.
- All datasources or All datamarts: each metric picks its own. New ones are included. You need 2 or more.
- Optional: turn on Private workspace so only you can open it. See Create a private workspace.
- Select Create workspace.
The workspace opens. Next, create a dashboard.
Plan limits
| Plan | Workspaces |
|---|---|
| Solo | 1 |
| Team | 3 |
| Business and Enterprise | Unlimited |
If something goes wrong
- Still needed: a workspace name. The footer lists what is missing. Fill it in, then select Create workspace again.
- A workspace named ”...” already exists. Use a different name.
- Needs 2 or more datasources. Connect another datasource to use All datasources.
- Your role cannot set what a workspace reads from. Ask an Admin to create the workspace, or to give your role the permission to connect workspace data.
- Your plan’s workspace limit has been reached. Delete a workspace you do not use, or ask an Admin to change the plan.