

Core Concepts
Workspaces
Organize your analytics projects with workspaces.
What is a workspace?
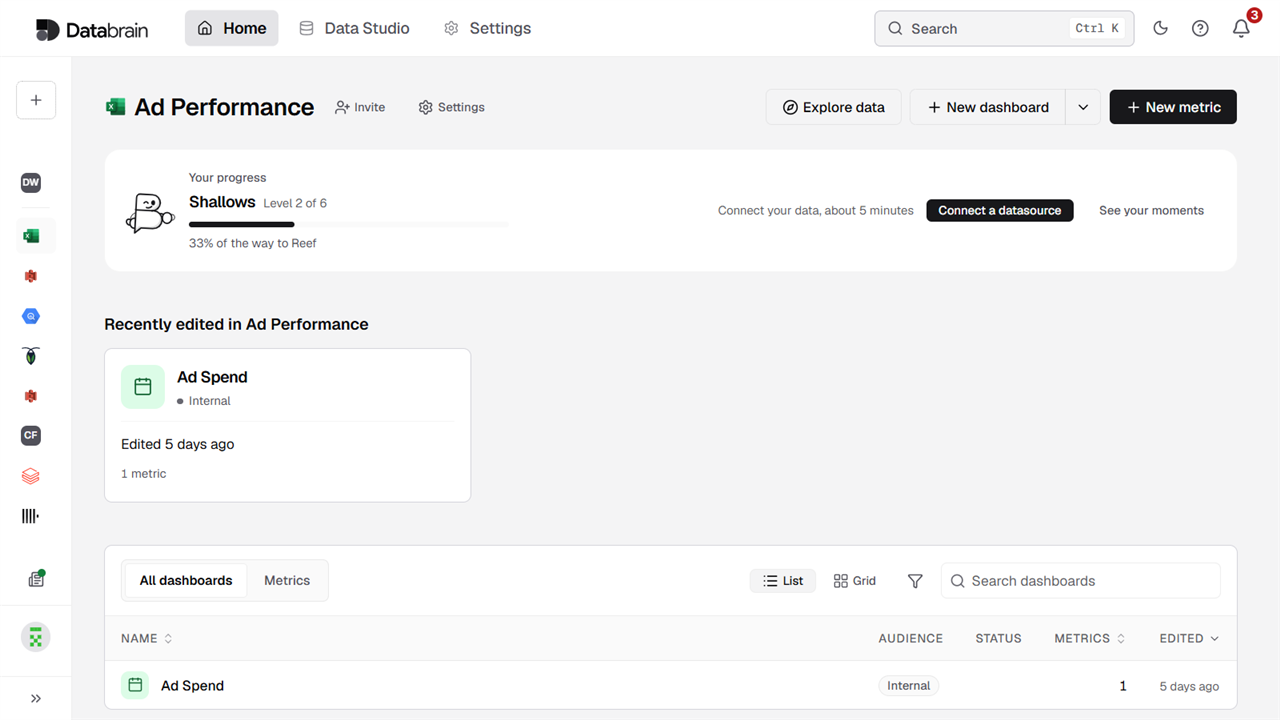
A workspace is a home for your analytics. It’s where you create dashboards and metrics, and where you decide which data they use. Think of it as a project or an environment, like “Customer reporting” or “Sales team”.
Each workspace keeps its own dashboards, metrics and data connection, so it’s easy to keep different projects, teams or environments apart.
What you can do with a workspace
- Organize your work. Keep each project’s dashboards and metrics together in one place.
- Work with your team. Select Invite at the top of the workspace to add a teammate to your organization with a role. See Invite users.
- Use one or many connections. Connect a single datasource or datamart, or let one workspace use all of them.
- Make it your own. Set the name, description, theme and more in the workspace settings.
A workspace organizes your work. It doesn’t separate one customer’s data from another’s. If you report to clients, set up tenancy, and make sure tenant scope is enforced on your queries and verified before you share anything. See Configure tenants.
Types of workspace
Standard workspace
A standard workspace is available to people in your organization based on the permissions they’ve been assigned. Each person’s role decides what they can do, and which workspaces it applies to: all of them, specific ones, or all except a few. Use it for work the team shares.
Best for:
- Shared team dashboards
- Department analytics
- Reports that span teams
Private workspace
A private workspace opens only for the person who created it. Other members of your organization can’t open it, even if they’re admins. Use it for work that isn’t ready to share.
Best for:
- Personal projects
- Drafts you’re still working on
- Experiments before you share them
You choose the type with the Private workspace switch on the creation form. To learn more, see Create a private workspace.
What’s inside a workspace
Every workspace has two main parts. You’ll find them on tabs under the workspace name:
- All dashboards: Collections of metrics and charts, all in one place.
- Metrics: The individual charts, tables and numbers that make up your dashboards.
To open a workspace, select Home, then pick it from the sidebar.
Create a workspace
Before you start, you’ll need:
- Permission to create workspaces.
- A datasource or datamart to use. If your organization has no datasources yet, the creation form shows Connect a datasource. If you have no semantic model or datamart yet, it offers Create a semantic model or Model a datamart.
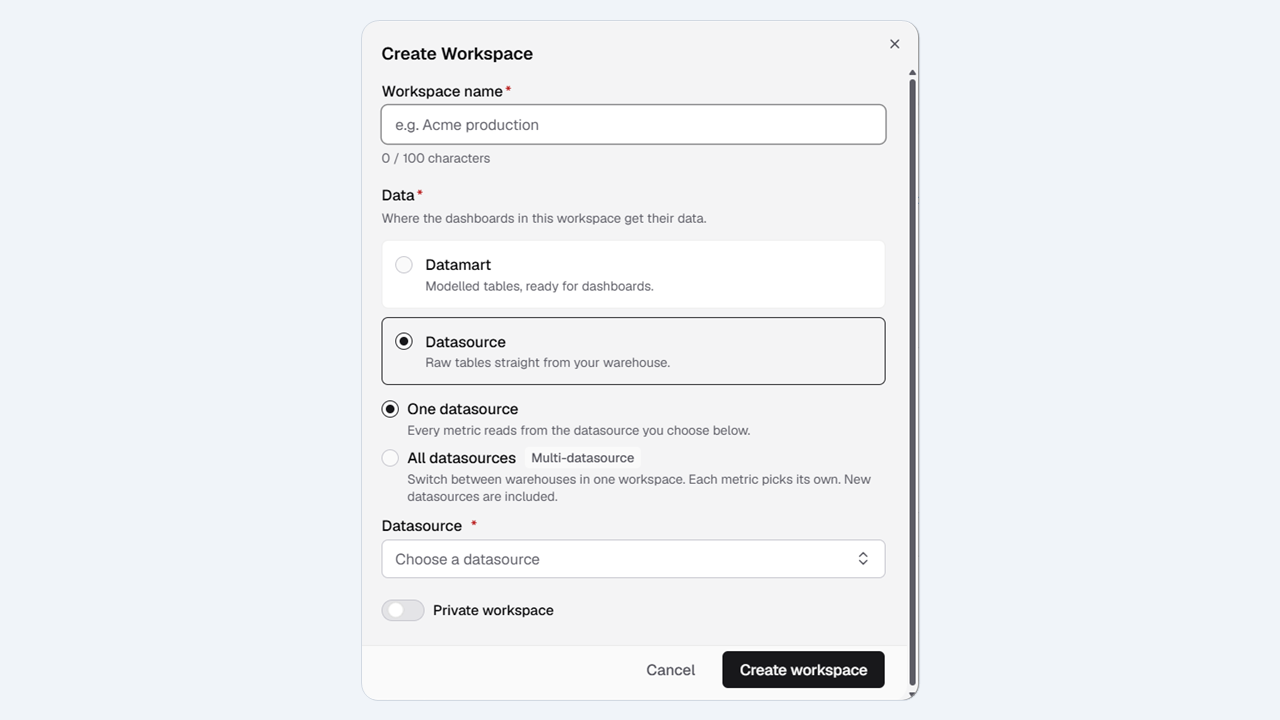
- Select Home, then select Create workspace at the top of the sidebar.
- Enter a Workspace name that’s easy to recognize, like the project or team it’s for.
- Under Data, choose what the workspace reads from:
- Datasource: raw tables straight from your warehouse.
- Datamart: modelled tables, ready for dashboards. This covers a semantic model or a datamart.
- Choose how many to use:
- One datasource (or One datamart): every metric reads from the one you pick. Select the picker below and choose it.
- If your organization has no datasources yet, Connect a datasource appears. Select it to add one first.
- For a datamart, if you don’t have one yet, select Create a semantic model or Model a datamart.
- All datasources (or All datamarts): the workspace can switch between several connections. You need at least two of that kind, and any you add later are included automatically.
- One datasource (or One datamart): every metric reads from the one you pick. Select the picker below and choose it.
- Turn on Private workspace if you want the workspace to be yours alone.
- Select Create workspace.
Your new workspace opens with No dashboards here yet. Select New dashboard to build your first one. If you change your mind, select Cancel to close the form without saving.
Choose a data connection
Every dashboard in a workspace reads from the workspace’s data connection. It’s a good idea to pick it before you create the workspace.
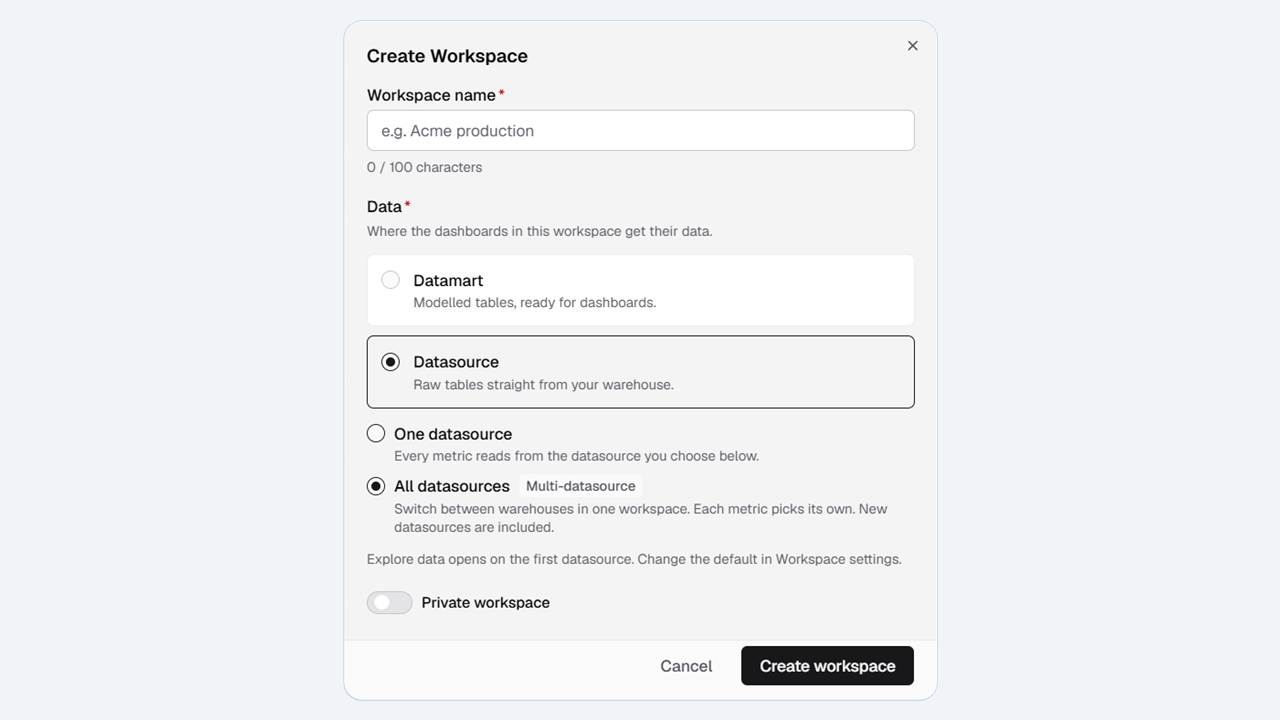
- One datasource: Your dashboards use a single database or warehouse. See Connect data.
- One datamart (or semantic model): You’ve already modelled your data and want to build on it. See Datamarts and Semantic layer.
- All datasources: You want to bring data from more than one database into the same workspace. Explore data opens on the first datasource, and you can change that default in the workspace settings. See Multiple datasources.
- All datamarts: You want to switch between a few of them in one workspace. See Multiple datamarts.
Creating a workspace doesn’t check that your tables imported correctly. If a file upload shows a schema error, make sure your tables are available before you build metrics.
Workspace settings
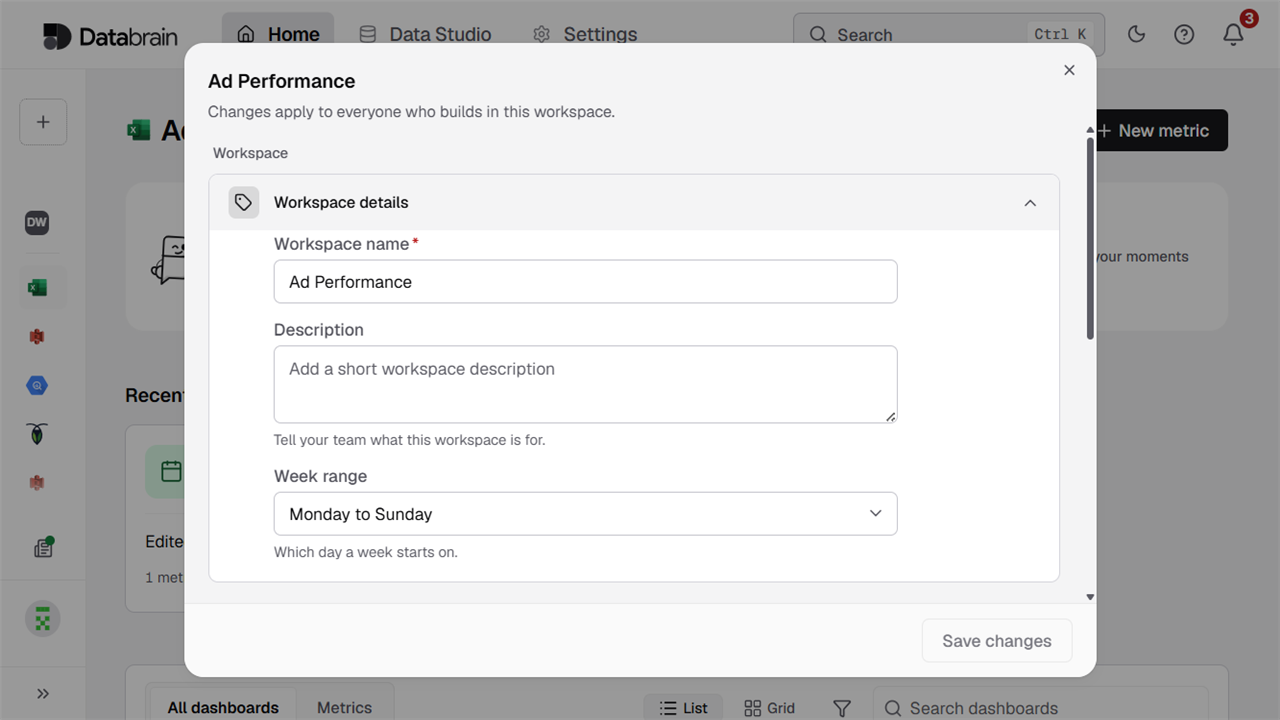
Each workspace has its own settings. To open them, go to the workspace and select Settings next to its name. Changes apply to everyone who builds in that workspace.
You can:
- Edit workspace details. Change the name, add a short description for your team, and choose which day the week starts on.
- Check connections. See which data the workspace uses, and which AI model it’s set to use.
- Set a theme. Pick the look and feel for the workspace.
- Adjust the cache. Control how query results are cached. See Cache settings.
- Turn AI helpers on or off. Under Intelligence, switch Metric summary and Metric suggestion on or off.
- Delete the workspace. This permanently removes the workspace, along with its dashboards and metrics. Any embed that shows them stops working, and it can’t be undone.
Select Save changes when you’re done. For more on each option, see Workspace settings.
Best practices
- Organize by project or team. Separate workspaces keep things clear and easy to find.
- Use descriptive names. Add the project, team or environment name so people can find the right workspace fast.
- Plan access early. Decide who needs which role before you share anything. See Invite users.
- Clean up regularly. Delete workspaces you no longer use so your list stays tidy.
Common ways to use workspaces
- SaaS product analytics: Create a workspace for each product area.
- Internal reporting: Give each department, like Sales, Marketing or Finance, its own workspace with the data it needs.
- Client reporting: Group each client’s dashboards in a workspace. To keep one client’s rows separate from another’s, configure tenancy, enforce tenant scope on your queries, and verify it before you share. See Configure tenants and Choosing the right tenancy model.
- Development and production: Keep separate workspaces for testing and for the live version.
Next steps
Building with the API?
You can create workspaces through the API too. The form uses friendly labels for the connection choices, while the API uses connectionType and resource-name fields. See the Create a workspace API page for the full request details.