

Dashboard filters
Create a dashboard filter
Add one filter that narrows every metric on the dashboard, then edit or delete it later.
Before you start
- You are an Admin or Editor.
- The dashboard’s datasource or datamart has tables. Add filter stays off until the data model loads.
Steps
Step 1: Filter values
-
Open the dashboard and select Add filter in the bar under the header.

Add filter is at the end of the filter bar under the header. -
Choose where the filter shows:
- Select: a dropdown list on the dashboard.
- Switch Select: an on/off toggle in the Filters panel.
- Other: viewers add it themselves from the Filters panel.
- Custom field: a filter on a custom field of the data model. Shows only if the data model has one.
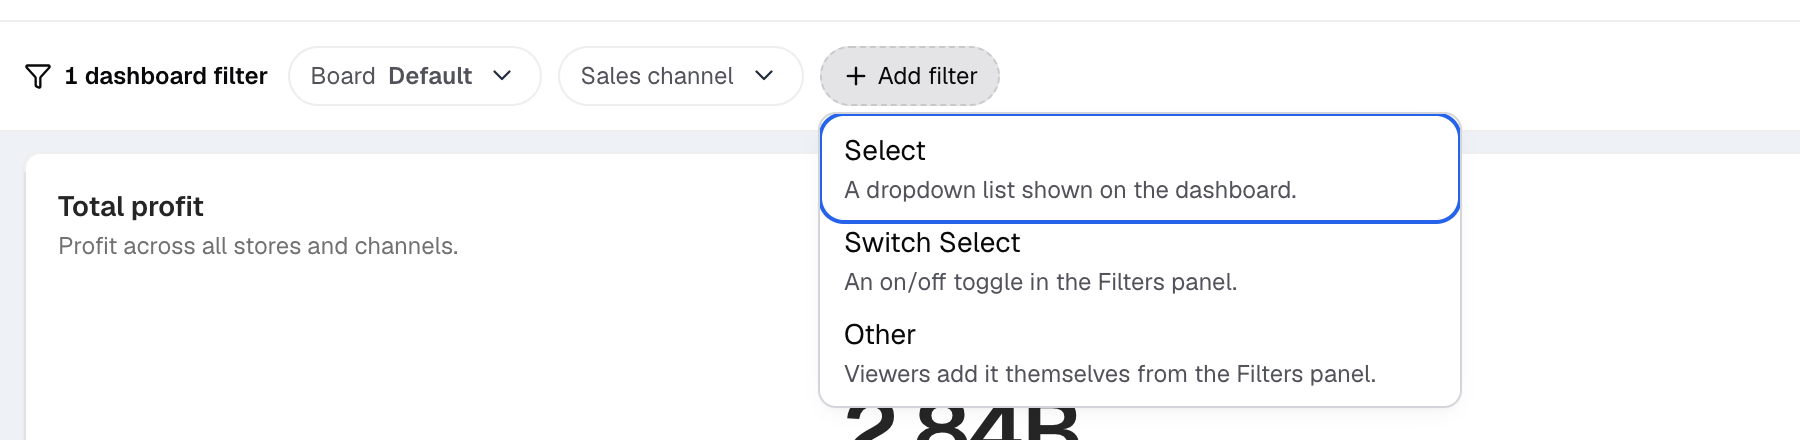
Add filter first asks where the filter shows. -
Enter a Filter Name, for example
Region. The other fields turn on after you enter a name.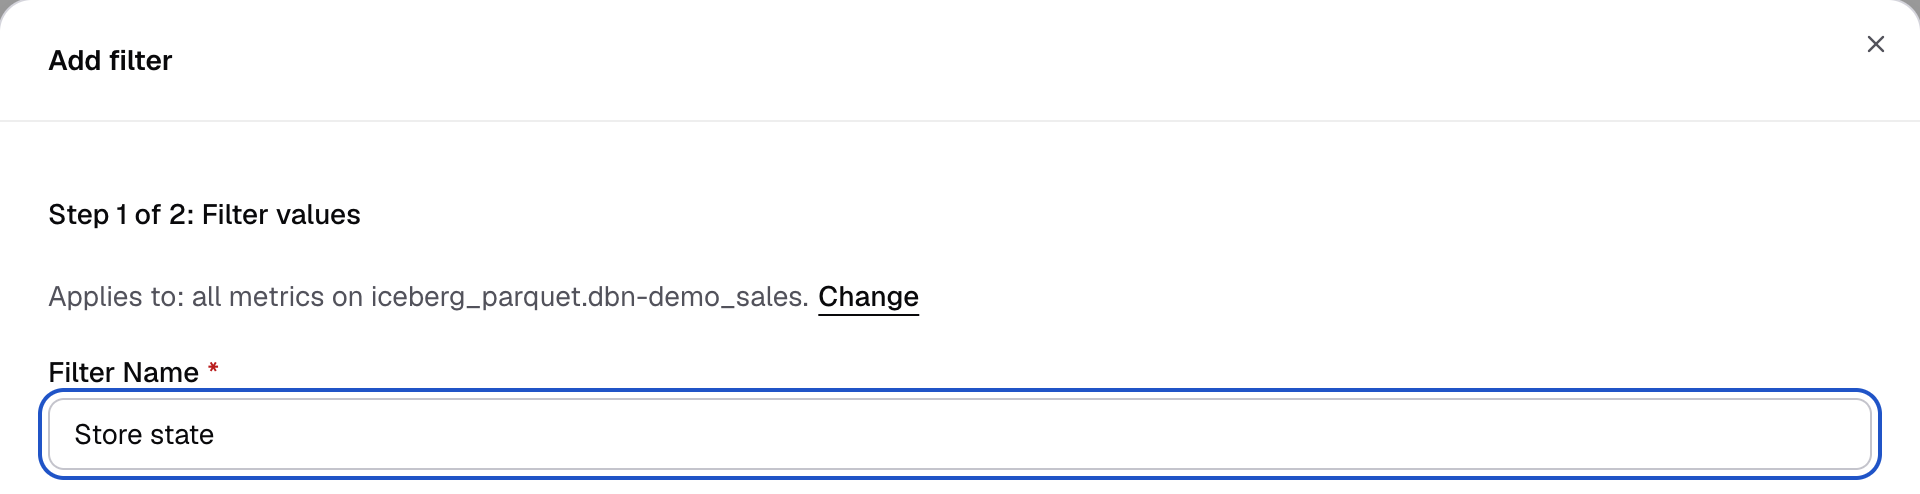
Step 1 of 2 starts with the Filter Name. -
Choose an Option Type:
- Auto: the values come from a column. Pick the Dataset, Choose a Column and, optionally, Choose a Unique Label Column.
- Manual: you type each option value and an optional option label.
- Custom: a SQL query returns the values. Enter the Column Name that the query returns.
- Range: a number range with a minimum and a maximum.
- Date: a date picker (Date Selection) or a list of presets (Preset Date).
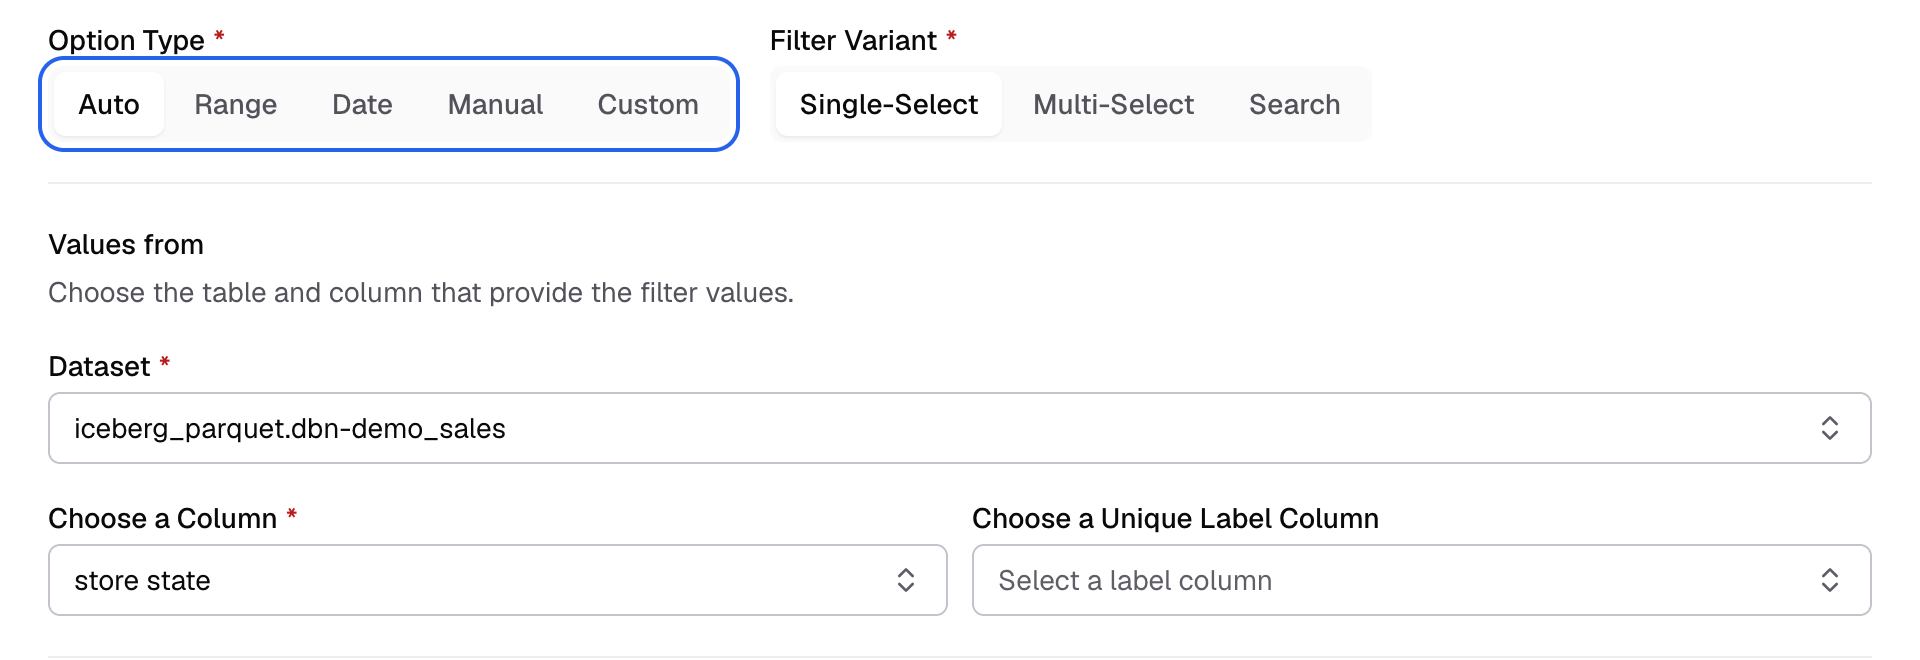
With Auto, pick the Dataset and the column under Values from. -
For Auto, Manual and Custom, choose a Filter Variant: Single-Select, Multi-Select or Search. Search is only for Auto.

Filter Variant sits to the right of Option Type. -
Optional: open Advanced options to set a Default Value, Depend On and more. See the list below.
-
Select Next.
Step 2: Apply filter
-
In Target, choose Apply on or Variable Filter.
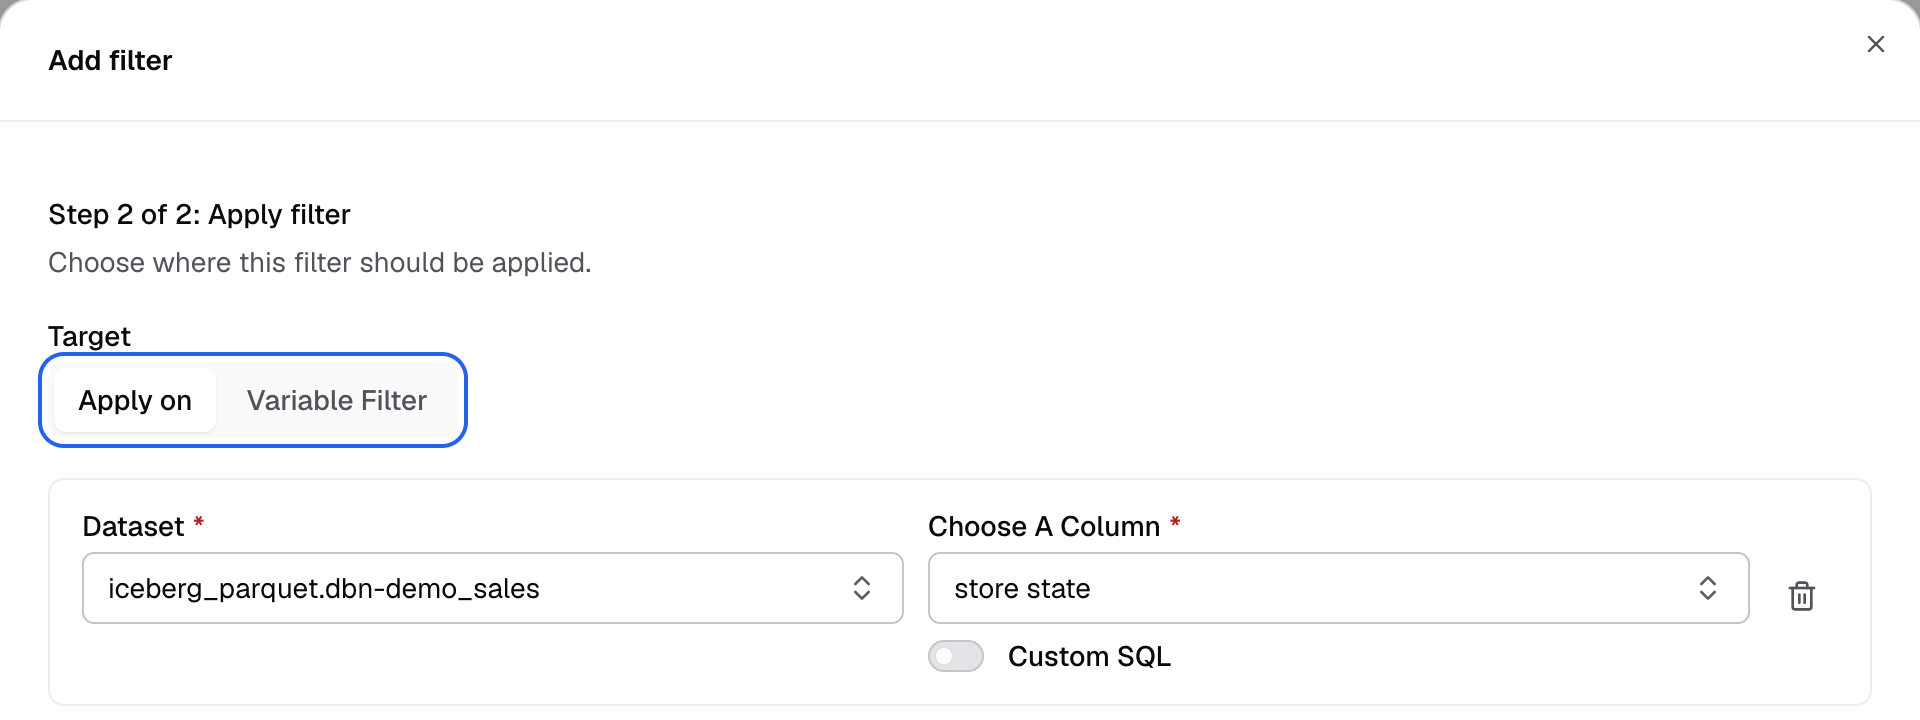
Step 2 of 2 starts with Target. -
For Apply on, pick the Dataset and Choose A Column that the filter narrows. Select Add option to add another dataset.
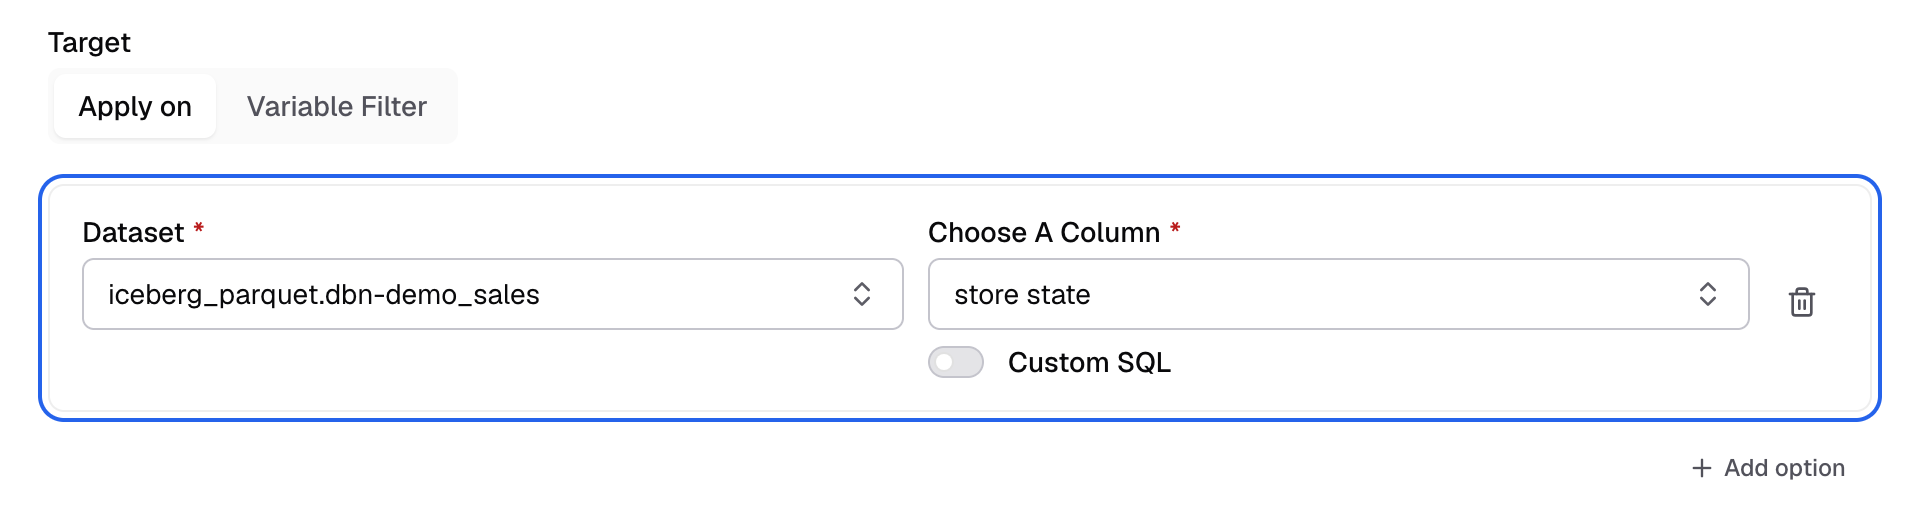
Pick the dataset and the column the filter narrows. -
Optional: in Restrict Metrics, pick the metrics the filter applies to. Leave it at All metrics to apply it to every metric.
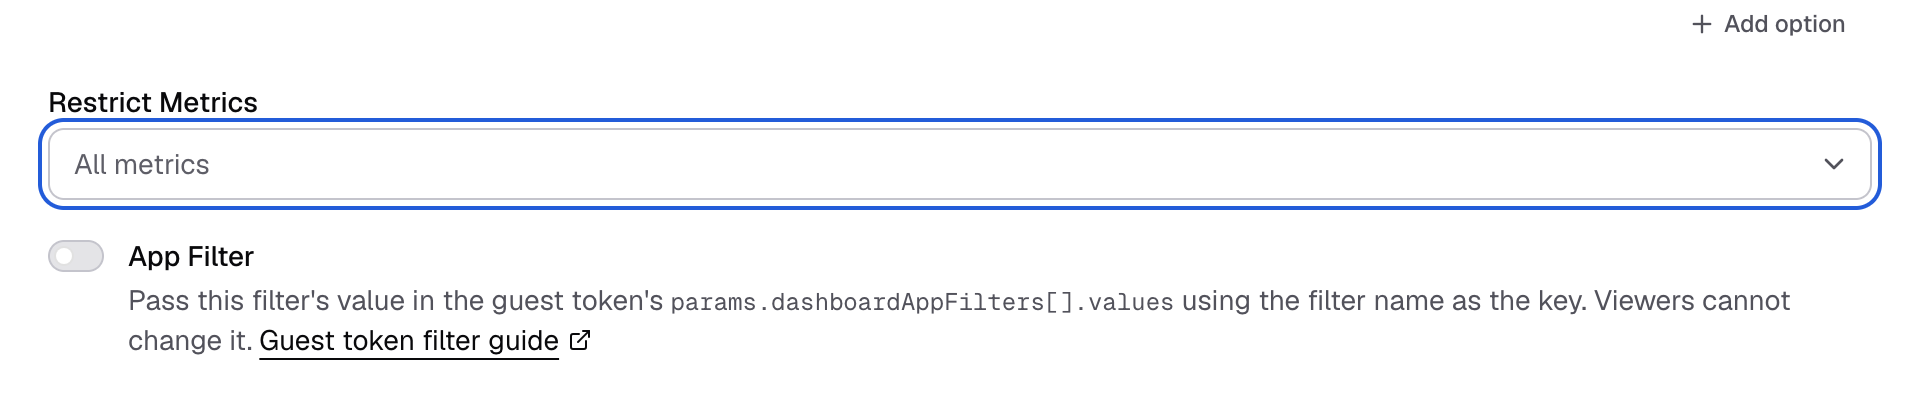
Leave Restrict Metrics at All metrics to filter every metric. -
Select Save.
The filter shows in the filter bar, and the metrics update when a viewer picks a value. Next, save filter views as boards.
Advanced options
- Show ‘Select All’ and Auto Select All Options: for Multi-Select.
- Enable the Clear Filter Option and Allow Sorting: for Single-Select and Multi-Select.
- Auto-Select the Default Value: picks a random, first or last value when the dashboard opens.
- Default Value: the value the filter starts with.
- Show Client Scoped Filter Options: shows each client only the values that match its id. Pick the Column and its Datatype.
- Depend On: narrows this filter’s values by what is picked in other filters. Not for Manual.
Other targets
- To pass the value into the metric SQL, use Variable Filter.
- To filter on an SQL expression, use Custom LHS and RHS SQL.
- To set the value from your server so viewers cannot change it, turn on App Filter. See Dashboard app filter.
Edit or delete a filter
-
In the filter bar, open the menu on the filter.
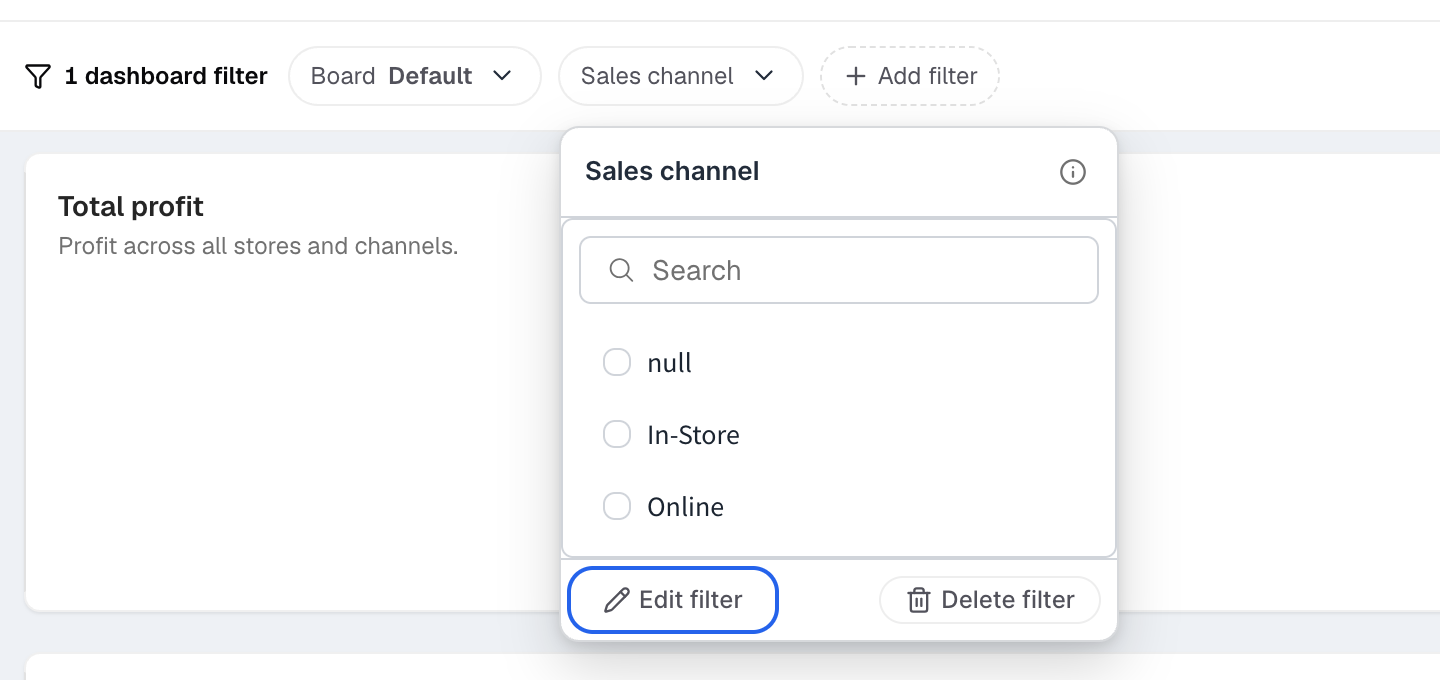
Open a filter to find Edit filter and Delete filter at the bottom. -
Select Edit filter or Delete filter.
Edit filter opens the same form, with the tabs Filter Options and Apply On. Delete filter asks you to confirm with Delete filter. You cannot undo a delete.
If something goes wrong
- Filter name should be unique. Another filter on this dashboard has this name.
- No tables available for filters. The datasource or datamart has no tables for this dashboard.
- The filter’s table and columns could not be found. The schema changed. Check the datasource or datamart.